Showing posts with label astrophotography. Show all posts

January 4, 2008

Photoshop Tutorial: Diffraction Spikes #1


Lately, I've been fooling around with my Adobe Photoshop, and decided to give a whirl at creating artificial diffraction spikes on wide-angle astrophotography. My final photograph will be submitted after this article because it is still in need of some processing, though I will include some great examples such as the preceding photo of the Pleiades, which has very visible diffraction spikes.

It should be noted that diffraction spikes actually detract from the scientific worth of a photograph, as certain features of stars may be obscured by their inclusion. They are strictly there to "pretty up" a photograph, and provide no calculable scientific value.

I have created a custom brush preset using instructions I found on IceInSpace.com, an Australian amateur astronomy website with some great information.
Do these steps and soon you're astrophotos will have those cool diffraction spikes on them as well! Look forward to my published photographs of Mars (similar to one already posted) stacked with Registrax and using IceInSpace's diffraction spike tutorial. It's going to be pretty cool, and I think a gigantic leap forward in quality.

November 30, 2007

Awesome Astrophotographer


I found this guy while crusing the digital astro group on Yahoo.

Joe Carr has some photos in his astrophoto gallery on Zenfolio. Truly amazing photographs; I thought these were Hubble images or something!

Truly talented, I think this is the type of quality all astrophotographers should strive for. Great job Joe!

Lights With No Sun


The ESA's Rosetta, the first ever spacecraft whose destination is a comet, took this picture of the Earth at night. Large cities are clearly visible as mankind's presence on this planet is clearly visible-- even when the Sun is not.

Rosetta has a super complex trajectory is making its course to comet 67P Rosetta. This includes not one, but three gravity assist maneuvers around Earth and another around Mars. This truly will show how efficient current technology can accurately predict the course of our probes.

Once reaching comet 67P Rosetta, the craft will remain in orbit with the comet during its journey to and from the Sun. In a nutshell, Rosetta will ultimately tell us what comets are made of, why they are different (or the same) as other intersolar materials, and give us a better idea of what the surface of a comet actually looks like.

Interesting mission to be sure, and likely it will present us with new information while verifying what we already know about comets. The study of the origin of comets never looked so sweet... just check out this picture of a very overexposed Mars taken by Rosetta's wide-angle camera against the stunning backdrop of our Milky Way. Every astrophotographers dream--wide angle astrophotography with a twist: no atmosphere!

November 17, 2007

Five Tips for Great Moon Photography


Photographing the moon can be a daunting task. There are several tips I can give about photographing the moon.


  1. Pick a Clear Night - This is very important. Any haze, clouds, wisps, or fog can ruin a shot. The less atmosphere you shoot through, the better the picture will be.


  2. Know Your Phases - Knowing the phase of the moon is crucial for what to expect in the resulting photograph. A full moon gives great pictures of features on the moon's surface, but half moons create shadows on the moon's surface that results in better definition.


  3. Know Your Camera Settings - The single most important fact of moon photography is a rudimentary understanding of your f stops, ISO, and shutter speed. The "auto-picture setting" features on most digital cameras will create a bright blur in the sky with absolutely no detail visible. It is possible to take great photos without the need of a tripod with the correct settings. Use a lower ISO setting to reduce noise, a shorter shutter speed to reduce blurring and negate the need for a remote shutter, and a higher aperture (f/stop) to collect as much light as possible in the short amount of time allowed by the camera to create the photograph. Focus on infinity.


  4. Know Where The Moon Is In The Sky - This is a basic one, but still an important one. If you have a clear view of the horizon, when the moon is rising at night time, you will get a deep orange color. As it rises it will become more of a yellowish color, and it will eventually become the bluish-white color we generally think of when we think of the moon. Depending on what you are going for, keep this in mind.


  5. Trial and Error - Experiment with different settings and record their results in a notebook, or even on back of the finished photographs. Get a feel for your camera; I can't provide exact settings because every camera is different. Keep this in mind: auto-picture won't work; you're gonna have to go all manual.

November 3, 2007

Some More Astrophotos!


This is a photo of Venus over the treeline on my property. I zoomed in to get a better shot, but if you look at the stars in the picture, you can see them start to trail. If you use a zoom lens on your camera, 30-second exposures are out of the question unless you have some sort of tracking.


This is a picture of the open cluster, the Hyades. Notice they form a perfect 'V' with the tip pointing to the upper-righthand corner of the photo. Again, this is a 20-second exposure with NO zoom.

October 31, 2007

Build Your Own Astro Cameras!

For the monetarily-challenged astrophotographers (such as myself), there is a simple alternative. Single-use, disposable cameras can make excellent astronomical cameras; with some modifications of course.


The idea behind the whole concept is simple: even though the camera is handicapped with a focal plane of around f/10, the removal of the shutter mechanism allows for long-exposure photography. All the original pictures taken by me on this site are taken at f/2.8, and more often than not are a 30-second exposure. However, for the budget-minded astrophotographer, we are simply replacing the poor focal length with more time to collect light. A 25-minute exposure will generally, under decent conditions, provide a photo yielding about 2.5 more stars than are visible. Not too shabby, especially since disposable camera bodies are free from most photo labs. You also will want to pick up some used film canisters with toothed spindles.

Since this technique is so useful, let's go through the steps to successfully disassemble, modify, and use our new astrocamera.


  1. Open the camera body cautiously by unsnapping the plastic tabs. One plastic tab should already be removed by the original film processor. Unsnap all the pieces, four in total: the front, the back, the middle (main camera part), and a cylindrical film roll.

  2. Find out if the camera model used a flash. If it does not, skip to step 3. The flash unit retains its charge long after use and can be quite dangerous. Since we are photographing very dim stars, we do not want a flash so we need to remove the unit completely. If the camera has a flash unit, you must short out the large capacitor by connecting both leads with an insulated wire. Do this more than once!!!

  3. Now that we have either disabled the flash unit and removed it (or skipped that step entirely if you did not have one) its time to get the shutter mechanism out. You will need to remove the lens assembly temporarily so we can reach the mechanism. The lens assembly is normally on a piece of black housing and there may be a metal band securing it. Remove this C-shaped piece of metal and discard. Be careful not to get your fingers on the lens! This can ruin an image and causes the camera to be out of focus. At this point carefully remove the lens and set it somewhere safe, preferably a lens (or glasses) microfiber cloth.

  4. With the lens assembly removed you should see the shutter mechanism. It is a hinged metallic piece. Remove the spring it is connected to and the hinged metallic piece itself. Leave the plastic piece it is connected to alone.

  5. With the shutter mechanism removed, carefully replace the lens assembly.

  6. With the lens assembly replaced, snap the camera body back together.

And there we have it; a perfectly functioning astrocamera. We still need to load it with film and that can get a little sticky because a disposable camera runs reverse of what a regular camera does. Here's the steps for film loading:

  1. Remove a toothed spindle from the used film canisters you acquired.

  2. Put the toothed spindle in the reusable film canister.

  3. Attach the end of the film to the spindle with a small piece of masking or electrical tape and wind it up.

  4. Put it into the film canister with a little bit of extra film hanging out.

  5. Secure the top by screwing it in; we don't want light getting in here.

  6. Fasten the extra film hanging out to the original cylindrical canister.

  7. Put the camera body back together.

And there we have it! A perfectly functional astrophotography camera. Unless your going for star trails, you're going to have to have a device to properly track the sky.

Check out my post on barnyard trackers!!!

On a personal note, I've done this once before when I was a kid in space camp and the pictures turned out awesome! I'm running mostly on memory on what we did, but to fill in the holes, I borrowed heavily from this site at astrosociety.org.

October 30, 2007

More Astrophotography From Last Night

Here's a few of my photos from last night's photo session. I mostly did some stuff with the comet, but took a few more snaps. Check em out!


October 24, 2007

New Astrophotography Series

I won't be doing this very often, but Friday will begin a five part article series: Astrophotography on a Budget. I wanted to give a heads up to the readers so we can have the chance t get the word out about this great series.

Some highlights:

  1. Essential freeware programs for the astrophotgrapher on a budget.
  2. Deep Space exposures under $2000!!
  3. Build your own Astro-Camera!!
  4. Much, much more!!

October 21, 2007

Adventures in Astrophotography

I've learned quite a few lessons trying to master this thing called astrophotography. . Here are a few tidbits from my first serious astrophotography adventure last night:

  1. You will quickly outgrow basic equipment. After one night, I'm dying to do a fifteen minute exposure on an equatorial mount.

  2. You get a lot of blurry shots; especially of the moon. Keep the best; pitch the rest.

  3. At high zoom levels, a good tripod is essential. Nothing like a 30-second exposure that looks like a lightsaber battle because the tripod wobbled.

  4. 30 second exposures (which is what the limit on my camera is) just starts to bring out invisible stars.

  5. In digital astrophotography, Photoshop or other digital image enhancement software is crucial to creating publishable pictures. Stars picked up on the picture often need a contrast increase to become clearly definied and visible.

I'm just learning about astrophotography. Even though I write the occassional astrophotography article, I'm as new as they come. This essentially, is my first real attempt at astrophotography since acquiring an understanding of aperture, shutter speed, and ISO.

Here are a few of my photos from last night's Orionid showe (unfortunately, no Orionids made an appearance in the photos):


October 12, 2007

Astrophotography: Barn Door Tracker


Ever pictured what the sky would look like with about ten times the amount of stars we have now in it? It sure would be beatiful. It actually does look like that, but your human eyes can only collect so much light, so little in fact, that we can't see nearly as many stars as other things.

Your camera is one of those other things. Your aperture is the setting that determines how much light gets let in. A wide open aperture (usually f/2.8) is a great start for astrophotography and will bring bright, high contrast stars into view with exposures of 15 seconds and even less.

But what about those super starry pictures you've seen? Well those must be on exposures much more than 15 seconds; more like 15 minutes! After your first fifteen minute exposure, you will learn a valuable lesson. The Earth rotates. You will have what is called "tracking errors" or blurs and in some cases, streaks. Star paths make good photos, however, to get a decent starry sky picture, you will have to compensate for the curvature and rotation of the Earth.

Ok, break out your graphic calculator and dust off your ancient calculus skills; this a math problem.

Just joking... thankfully one wonderous astronomer has already figured out all the trig, angles, and square roots of the problem and provided us with a simple solution for under $10: the barn door tracker (also called a Scotch mount).


With precise measurements listed in the construction details, you track the rotation of the Earth through a camera near perfectly up to fifteen minutes. With an exposure this long with precise compensation for the rotation of the Earth, you will get astonishing photographs! Check out this photo of the Andromeda Galaxy with just a simple camera.

Construction is straight-forward and simple; you just need to make some precise length cuts. Check out these pages for the construction:
  1. http://www.jlc.net/~force5/Astro/ATM/Barndoor/barndoor.html (Motorized)
  2. http://hometown.aol.com/davetrott/page17.htm (Double Arm Design)
  3. http://www.mikeoates.org/mas/projects/scotch/ (Quartz controlled)
  4. http://www.geocities.com/Athens/Column/8102/ (Simple manual design)
Photos courtest of NiteLite Astrophotography web page!

October 8, 2007

Five Tips for Amatuer Astrophotographers


Here's a few tips for armchair astronomers (such as myself) who have a digital camera, but no telescope:

1.) Buy a Tripod - Buying a tripod does not have to be terribly expensive. You don't need the most expensive kind, just one that will stabilize the image. If you are like me, you've never shot long exposure pictures, which a tripod really helps with. Which brings me to...

2.) Shutter speed - When we take standard photos, it happens pretty quick, usually 1/1000th of a second is what the shutter speed is set at. When we photograph stars, they typically are very dim. We need to set the shutter speed for as long as it will go. Usually the longest you can set this is 15 seconds, but many models have a manual shutter speed that lets you control how long your soon-to-be photo is exposed. The longer the better... to a certain point, so be sure to experiment with your particular model of camera!

3.) Aperture - This is a variable sized hole in the camera that controls how much light hits your digital sensor. You want the the largest sized hole, usually f/2.8. The smaller the number, the larger the hole. f/2.8 is a larger hole, thus allowing more light into the camera, than an aperture size of f/5.6. You want the largest aperture available on your camera to take night sky photographs.

4.) ISO - This setting is usualy set at 100, but can have different default camera settings. Generally, the higher the ISO, the brighter the picture is, however, the result with have more "noise" and appear grainy. More expensive cameras have ISOs of 800, 1600, or even 3200. Try the highest ISO setting when you take photographs and reduce the ISO if the image appears too excessively grainy.

5.) White Balance - This is normally set to automatic by default. Set your white balance to incandescent for much better results. Some expensive cameras have custom white balance filters which can end up looking even better than the incandescent preset. Experiment... but remember, the automatic setting on this will make the photo results less than desireable; especially near light pollution.


6.) Focus - Easy one... take it off manual and focus on infinity (the furthest possible point away i.e. the sky)!


Now your ready to shoot some serious stars. Even with a consumer grade digital camera, you can actually see more stars than are actually visible because your camera is literally collecting any light it can find for 15 seconds (or more if your using manual shutter speed).

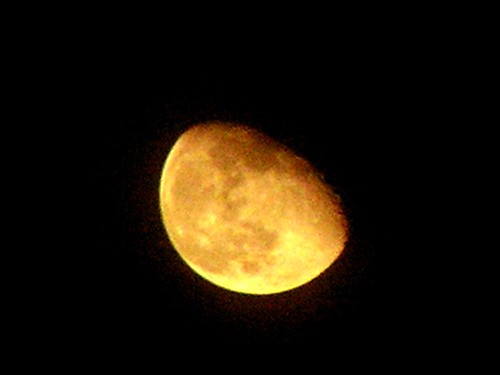
The example photo up top is courtesy of Chris Picking from Starry Night Photography. His site has tons of photos of celestial bodies. Check it out; it's well worth it.

September 24, 2007

Astrophotography: My Very First Try


This morning I woke up early with my daughter and decided that I was going to try to take advantage of my digital camera's high zoom and a tripod I found laying around. The following are my very first ever photos of Venus taken. While certainly not "groundbreaking", I at least got close enough to distinctively show that it's a planet.

The planet actually showed up exceptionally well on the LCD, however, the tripod was absolutely necessary or it wouldn't have been stable enough to photograph. The color got completely out of whack when I took the picture, and I think it is because the sun was coming up pretty fast. The pictures came out kind of well, so I'm thinking I might better prepare myself for tomorrow. I didn't realize this, but my camera has like a 40x Mega Zoom. It's a Konica Minolta Dimage Z1. While my pics are no Bob Johnson pics, I think it's a good start into the world of amateur astrophotography. I've currently got Moon and Milky Way on my "pictures without a telescope" list.
I'm an amatuer astronomer (as I like to think of myself) without a telescope, but the digital camera did pretty well.

If you're interested in amateur astrophotography, you should head over to Astropix and take a look at some of the great pics and advice. Great book!